DEFORM-3D_使用手册【英文版】(图例)

摘要:
本文为 DEFORM-3D 完整实操教程,系统讲解软件各类仿真流程与操作要点。内容涵盖方块锻压、方环成形、热锻转运与保温、多锤锻造、模具应力分析等经典案例,同时介绍连杆、齿轮座等工业基准件模拟及锻轧专用向导用法。教程分步演示模型导入、网格划分、材料赋值、边界与摩擦设置、运动参数定义、仿真提交等前处理操作,详解分步仿真、多工序接续、模具更换的设置方法,以及载荷、应变、温度、应力等结果的后处理查看与分析。还对比了绝对 / 相对网格优劣,说明求解器、并行运算、单位适配等实用技巧,内容全面、步骤详实,可指导使用者开展各类金属塑性成形、传热及模具力学仿真。
DEFORM TM-3D Tutorials
1. BLOCK PRE-PROCESSING
1.1. Creating a New Problem
1.2. Setting Simulation Controls
1.3. Loading Object Data
1.4. Display Manipulation
1.5. Point Selection
1.6. Other DISPLAY Window Buttons
1.7. Saving the Problem
1.8. Exiting DEFORM-3D
1. BLOCK Pre.Processing
1.1. Creating a New Problem
On a unix machine, type DEFORM3 to open DEFORM™-3D. On a Windows machine, go to the  button and select DEFORM-3D from the menu. The DEFORM-3D MAIN window will appear, as shown below.
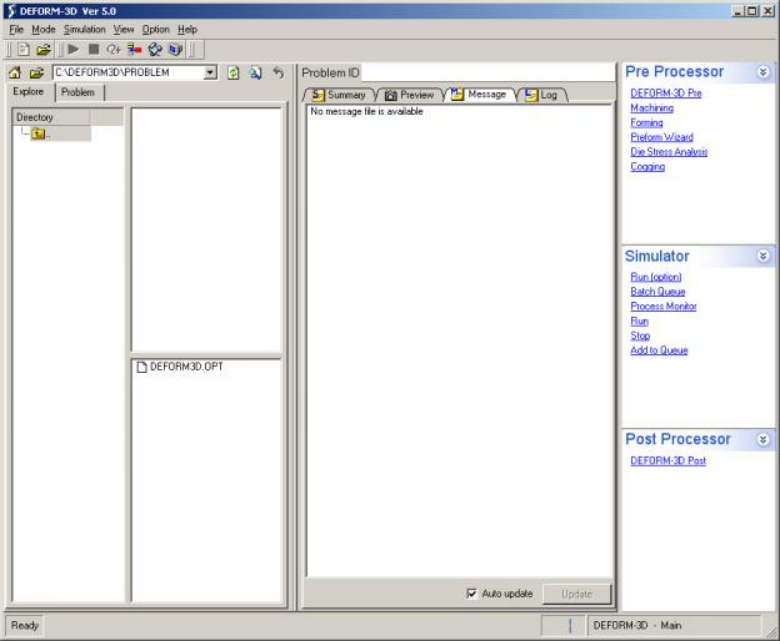
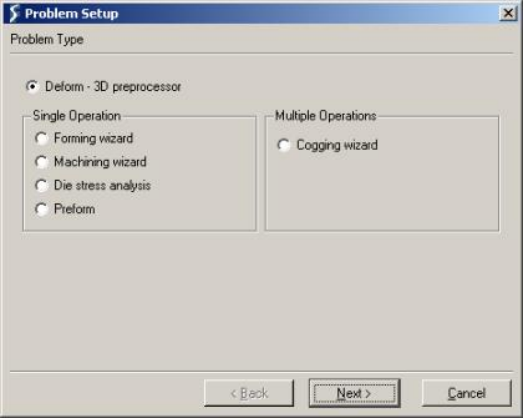
Create a new problem by either selecting File → New Problem or by clicking the New Problem  icon. The PROBLEM SETUP window will appear. Accept the default setting of opening a new problem using the DEFORM-3D pre-processor (and not one of the wizards) by clicking
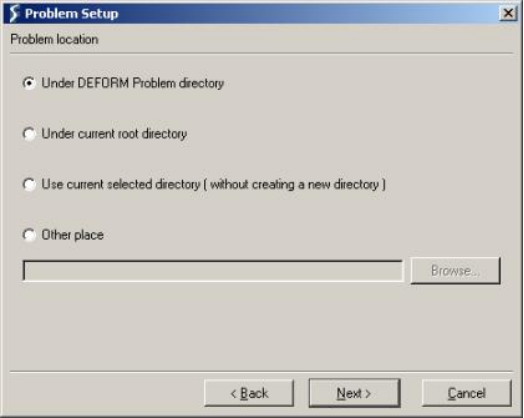
Click  to define the location of the new problem ’Under DEFORM Problem directory’.
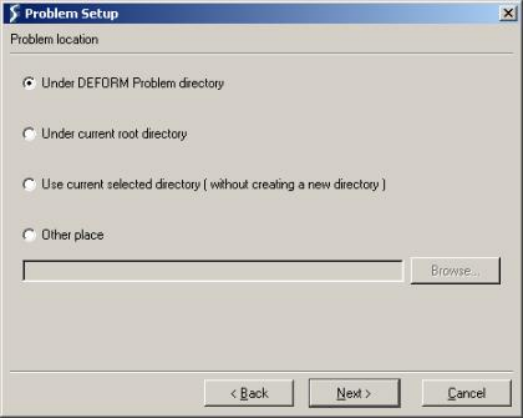
In the field for Problem Name, call the problem Block and click  .
.
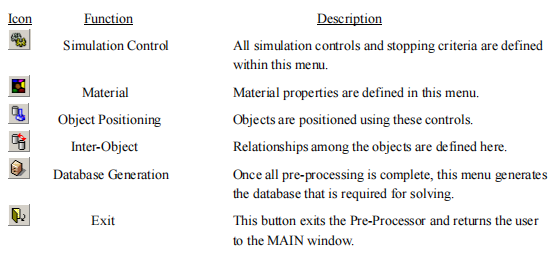
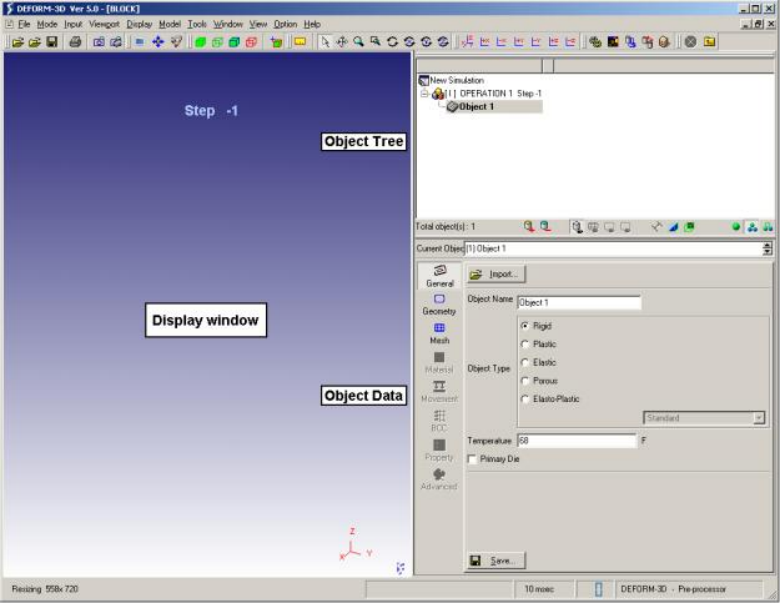
The DEFORM-3D Pre-processor will open. The Pre-processor is divided into several distinct sections - namely the DISPLAY window, the Object Tree and Object Data. There is also a row of icons along the top of the screen. These icons will be described as they are encountered in the labs. The most important of the icons are the ones located at the top right. Due to their importance, a brief description of each is given:
1.2. Setting Simulation Controls
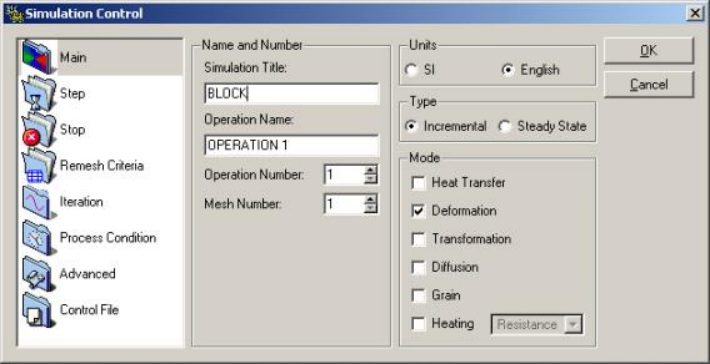
Click on the  icon to open the SIMULATION CONTROL window. Change the Simulation Title to Block. Make sure that the Units are set to English and that Deformation is activated (has a checkmark next to it). Click the
  button when finished.
1.3. Loading Object Data
Add an object to the problem by clicking the Insert object  button at the bottom of the Object Tree. hange the Object Name from Object 1 to Block and click
 . Set the Object Type to Plastic.
Within DEFORM, the surface definition of an object is referred to as it’s geometry. To import
the object’s geometry, click and then the
  button.
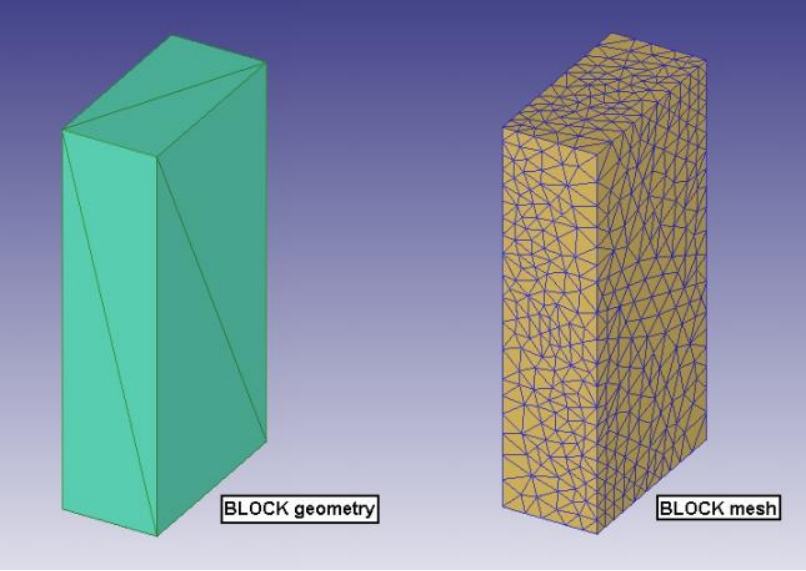
The most common type of file for importing geometry into DEFORM-3D is the stereolithography (.STL) file. The geometry for the Block is located in the file Block_Billet.STL in the DEFORM3D\V5.0\Labs directory. Once you have found and selected this file, click the  button to import the geometry into DEFORM. The geometry of a rectangular block should now be visible in the DISPLAY window.
Now that a surface geometry has been defined for the Block, a finite element mesh can be generated for the object. Click on the  button to bring up the Meshing Controls. Click on the
 button to see what the surface mesh looks like when using the default mesh settings. The surface mesh that is created looks good, so click the
  button to finish the meshing process. When the meshing is complete, the object should have almost 5000 elements (which can be seen either in the Object Tree or in the Summary section of the Meshing Controls).
1.4. Display Manipulation
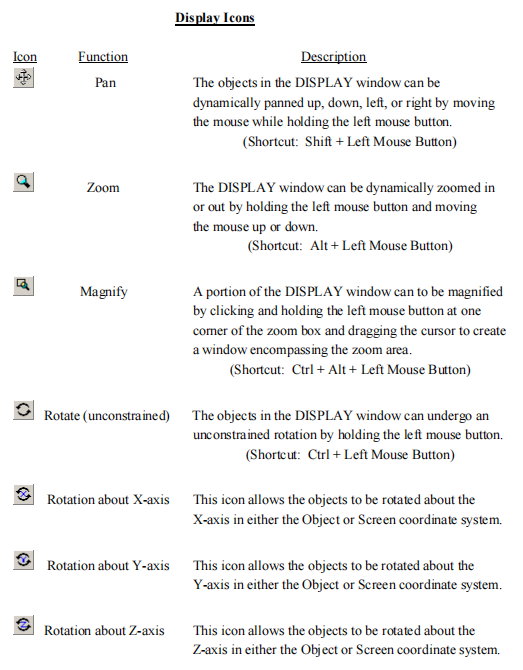
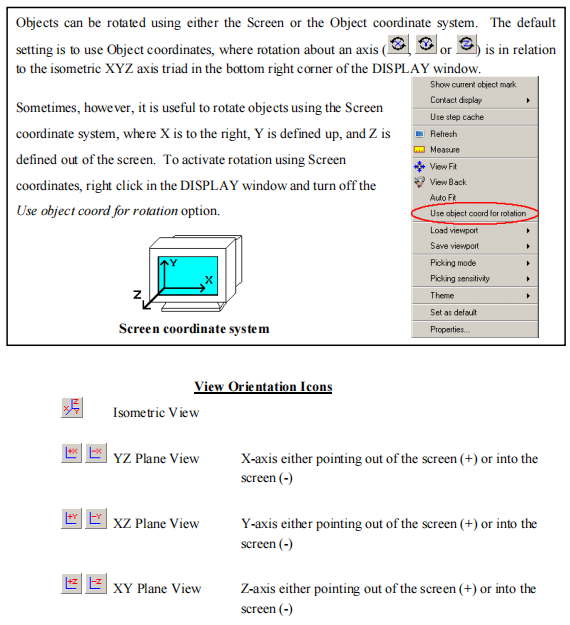
Functions that manipulate the DISPLAY window (such as Pan, Zoom, Magnify, and Rotate) can be activated using icons at the top of the Pre-processor window. These functions also have easy keyboard/mouse combination hotkeys that allow the user to quickly perform these functions without any excessive button clicking. Once you have read about these functions, feel free to use them to manipulate the view of the Block in the DISPLAY window.
1.5. Point Selection
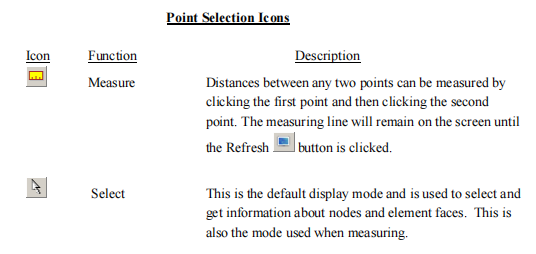
Any point on an object in the DISPLAY window can be selected to obtain the corresponding data for that point. Also, distances can be measured either between two points on one object or between two points on different objects.
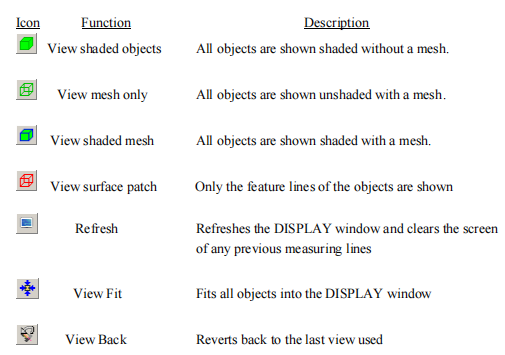
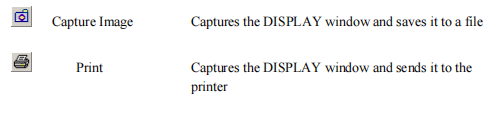
1.6. Other DISPLAY Window Icons
The following icons are also used when viewing objects in the DISPLAY window:
1.7. Saving the Problem
This is a good point to save your data. To save the data to a keyword file, either select File → Save or click the Save  icon. The information will be saved in a file called Block.KEY.
1.8. Exiting DEFORM.3D
If you are continuing on to Lab 2, it is not necessary to exit DEFORM-3D.
If you are not continuing on to Lab 2, click the Exit  icon.
icon.
Once you are back in the MAIN window, you can exit DEFORM-3D by selecting File → Quit or
by clicking  . When asked whether you want to quit, click
  .
.
详细内容请见附件
免责声明:
本页面/内容部分素材来源于互联网公 开 信 息,旨在传递更多信息,不代表本平台立场。
版权归原作者或机构所有,如涉及侵权,请通过平台联系我们,我们将在核实后第一时间处理。
本平台对转载内容的真实性、准确性不作任何保证,用户需自行判断并承担使用风险。