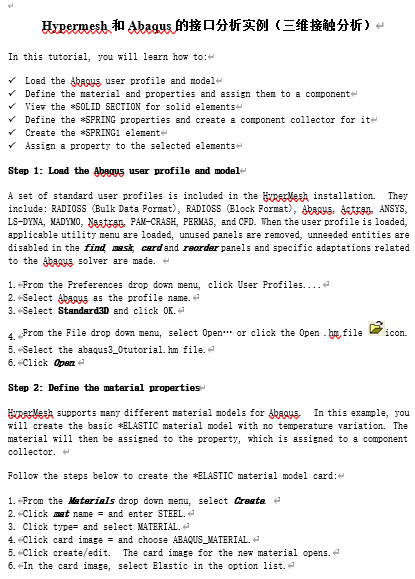
摘要:本材料聚焦HyperMesh与主流求解器接口的高级应用技术,系统阐述协同建模与后处理全流程。核心内容涵盖接口基础配置,包括输入输出模板、用户自定义菜单与宏命令设置;详解模型数据定义,涉及材料、截面、单元类型、边界条件与载荷的标准化创建流程;重点演示inp文件导入、非线性材料定义、局部坐标系、接触配对、幅值曲线及几何载荷映射等高级功能。同时说明利用HyperView进行ODB结果文件的可视化分析,包括云图、矢量图与历史曲线绘制,结合大量实操案例,完整覆盖从前处理到后处理的技术链路,提升复杂模型的求解效率与分析精度。Inthistutorial,youwilllearnhowto:LoadtheAbaqususerprofileandmodelDefinethematerialandpropertiesandassignthemtoacomponentViewthe*SOLIDSECTIONforsolidelementsDefinethe*SPRINGpropertiesandcreateacomponentcollectorforitCreatethe*SPRING1elementAssignapropertytotheselectedelementsStep1:LoadtheAbaqususerprofileandmodelAsetofstandarduserprofilesisincludedintheHyperMeshinstallation.Theyinclude:RADIOSS(BulkDataFormat),RADIOSS(BlockFormat),Abaqus,Actran,ANSYS,LS-DYNA,MADYMO,Nastran,PAM-CRASH,PERMAS,andCFD.Whentheuserprofileisloaded,applicableutilitymenuareloaded,unusedpanelsareremoved,unneededentitiesaredisabledinthefind,mask,cardandreorderpanelsandspecificadaptationsrelatedtotheAbaqussolveraremade.1.FromthePreferencesdropdownmenu,clickUserProfiles....2.SelectAbaqusastheprofilename.3.SelectStandard3DandclickOK.4.FromtheFiledropdownmenu,selectOpen…orclicktheOpen.hmfileicon.5.Selecttheabaqus3_0tutorial.hmfile.6.ClickOpen.Step2:DefinethematerialpropertiesHyperMeshsupportsmanydifferentmaterialmodelsforAbaqus.Inthisexample,youwillcreatethebasic*ELASTICmaterialmodelwithnotemperaturevariation.Thematerialwillthenbeassignedtotheproperty,whichisassignedtoacomponentcollector.Followthestepsbelowtocreatethe*ELASTICmaterialmodelcard:1.FromtheMaterialsdropdownmenu,selectCreate.2.Clickmatname=andenterSTEEL.3.Clicktype=andselectMATERIAL.4.Clickcardimage=andchooseABAQUS_MATERIAL.5.Clickcreate/edit.Thecardimageforthenewmaterialopens.6.Inthecardimage,selectElasticintheoptionlist.Bydefault,theselectedtypeisISOTROPIC.Ifnot,clicktheswitchandselect7.ISOTROPIC.Bydefault,theELASTICDATACARDS=fieldvalueis1.Ifnot,input1tosetthe8.numberofdatalines.9.ClickthefieldbeneathE(1)andenter2.1E5.10.ClickthefieldbeneathNU(1)andenter0.3.11.Clickreturntoacceptthechangestothecardimage.12.Clickreturntoexitthepanel.Step3:Definethe*SOLIDSECTIONproperties1.FromthePropertiesdropdownmenu,selectCreate.2.Clickpropname=andenterSolid_Prop.3.Chooseacolorfortheproperty.4.Clickontype=andsetittoSOLIDSECTION.Thisensuresthatsectionspertainingonlytosolidelementsareavailableascardimageoptions.Alternatively,thetype=fieldcanbesettoALLensuringthatallavailablecardimagesarelisted.5.Clickoncardimage=andselectSOLIDSECTION.6.Clickmaterial=andselectSTEEL.7.Clickcreate.8.Clickreturntoexitthepanel.Step4:AssignthepropertytothecomponentBecausethematerialisassignedtotheproperty,whenyouassignthepropertytoacomponent,thematerialisautomaticallyassignedaswell.1.FromtheCollectorsdropdownmenu,selectEditandselectComponents.2.ClicktheyellowcompsbuttonandselectINDENTORandBEAMfromthelist.3.Clickselect.4.Ifnecessary,clickthetoggletoswitch<propertyblank>toproperty=.5.Double-clickproperty=andselecttheSolid_Prop.Noticethatthecardimage=andmaterial=arealreadysetfromtheSolid_Propproperty.6.Clickupdate.7.Clickreturntoexitthepanel.Step5:Viewthe*SOLIDSECTIONforsolidelementsHyperMeshsupportssectionalpropertiesforallelementsfromthepropertycollector.Completethestepsbelowtoviewthe*SOLIDSECTIONcardforanexistingcomponent:1.FromthePropertiesdropdownmenu,selectCardEdit.2.ClickpropsandselectSolid_Propfromthelistofpropertycollectors.3.Clickselecttofinishtheselectionprocess.4.Clickedittoviewthe*SOLIDSECTIONpropertycardimage.5.Clickreturntofinishtheviewingprocess.6.Clickreturntoexitthepanel.Step6:Definethe*SPRINGpropertiesInAbaquscontactproblems,itiscommontouseweaklygroundedspringstoprovidestabilitytothesolutioninthefirstloadingstep.Thissectionexplainshowtocreatethesespringsandhowtocreatethe*SPRINGcard.Completethestepsbelowtocreatethe*SPRINGcard:1.FromthePropertiesdropdownmenu,selectCreate.2.Clickpropname=andtypeinSpring_Prop.3.Chooseacolorforthepropertycollector.4.Clickontype=andsetittoLINESECTION.Thisensuresthatsectionspertainingonlyto1Delementsareavailableascardimageoptions.Alternatively,thetype=fieldcanbesettoALLensuringthatallavailablecardimagesarelisted.5.Clickoncardimage=andselectSPRING.6.Clickmaterial=andselectSTEEL.7.Clickcreate/edit.8.Inthedof1field,enter3.Thedof2fieldinthe*SPRINGcardisignoredbyAbaqusforSPRING1elements.9.IntheStiffnessfield,enter1.0E-5.10.Clickreturntoacceptthechangestothecardimage.11.Clickreturntoexitthepanel.Step7:Createacomponentcollectorforthe*SPRINGproperty1.FromtheCollectorsdropdownmenu,selectCreateandselectComponents.2.Clickcompname=andtypeinGROUNDED.3.Chooseacolorforthepropertycollector.4.Ifnecessary,clickthetoggletoswitch<propertyblank>toproperty=.5.Double-clickproperty=andselecttheSpring_Prop.Noticethatthecardimage=andmaterial=arealreadysetfromtheSpring_Propproperty.6.Clickcreate.7.Clickreturntoexitthepanel.Toresettheviewforfurtherprocessing:1.Clicktheisometricviewicon.Step8:CreatetheSPRING1element1.FromtheMeshdropdownmenu,selectAssignandselectElementType.2.Inthe1Dsub-panel,clickmass=andselectSPRING1.InHyperMesh,groundedelementsarecreatedandstoredasmasselementssincetheyonlyhaveonenodeintheelementconnectivity.3.Clickreturntoexitthepanel.4.Onthestatusbaratthebottomofthewindow,thenameofthecurrentcomponentisdisplayed.Clickonthatname.5.SelectGROUNDEDfromthelistofcomponentcollectorsthatappears.Asthespringelementsarecreated,theywillbeplacedinthiscomponent.6.FromtheMeshdropdownmenu,selectCreateandselectMasses.7.Clicknodesandselectbyidfromthepop-upmenu.8.Intheid=field,enter451t460b3andclickEnteronthekeyboard.Thisshorthandselectsallofthenodesfrom451to460inincrementsof3.9.Clickcreate.10.Clickreturntoexitthepanel.定义接触面和相互作用Step9:StarttheContactManager1.FromtheUtilitymenu,clicktheContactManagerbutton.TheAbaqusContactManagerdialogopens.Step10:Createthe"Indentor-top"surface1.SelecttheSurfacetabintheAbaqusContactManagerdialog.2.ClicktheNew…button.TheCreateNewSurfacedialogopens.3.IntheName:field,enterindentor-top.4.SelectElementbasedasthetypeofsurface.5.ClickColorandselectacolor.6.ClickCreate….TheElementBasedSurfacedialogopensfordefiningelementsandcorrespondingfacesforthesurface.7.IntheModelBrowser,expandtheComponentsfoldertodisplayallthecontents.Right-clickonindentorandselectIsolate.8.Clicktheuserviewsiconandselecttop.9.IntheElementBasedSurfacedialog,selecttheDefinetab.10.IntheDefinesurfacefor:list,select3Dsolid,gasket.11.ClicktheElementsbutton.Thisopenstheelementselectorpanel.12.Clicktheelemsbutton.13.Selectbycollector.14.Checktheindentorcomponentandclickselect.Youwillseetheelementsinindentorcomponenthighlighted.15.ClickproceedtoreturntotheElementBasedSurfacedialog.16.SelectSolidskinoptionfromtheSelectfacesby:radiobuttons.17.SelectacolorfromtheSolidskincolor:button.18.ClicktheFacesbutton.Thiscreatesatemporaryskinoftheselectedelementsandopenstheelementselectorpanel.19.Selectanelementfromthetopofthesolidskin.20.Clicktheelemsbuttonandselectbyface.Youwillseeallfacesatthetopofthesolidskinarehighlighted.21.RotatethemodelinHyperMeshinterfacetoverifyalldesiredfacesareselected.Youcandeselectanyelement(byrightclicking)oraddmoreifyoulike.22.Whenyouaresatisfiedwiththeelementfacesselected,clickproceedtoreturntotheElementBasedSurfacedialog.23.ClicktheAddbuttontoaddthesefacestothecurrentsurface.Thiscreatesspecial"face"elements(rectangleswithdotinthemiddle)fordisplay.Youcanrejecttherecentlyadded"faces"byclickingtheRejectbutton.Youcanalsodelete"faces"fromtheDeleteFacepage.Whensatisfiedwiththesurfacedefinition,clickClosetoreturntotheAbaqus24.ContactManagerdialog.Step11:Createthe"Beam-bot"surface1.SelecttheSurfacetabintheAbaqusContactManagerdialogandclicktheDisplayNonebuttontoundisplayallsurfaces.2.ClicktheNew…button.ThisopenstheCreateNewSurfacedialog.3.IntheName:field,entercylinder-top.4.SelectElementbasedasthetypeofsurface.5.ClicktheColor:buttonandselectacolor.6.ClickCreate….TheElementBasedSurfacedialogopensfordefiningelementsandcorrespondingfacesforthesurface.7.IntheModelBrowser,expandtheComponentsfoldertodisplayallthecontents.Right-clickonBeamandselectIsolate.8.IntheElementBasedSurfacedialog,selecttheDefinetab.9.IntheDefinesurfacefor:list,select3Dsolid,gasket.10.ClicktheElementsbutton.Thisopenstheelementselectorpanel.11.Clicktheelemsbutton,selectbycollector,checkBeamcomponentandclickselect.ThishighlightstheelementsinBeamcomponent.12.ClickproceedtoreturntotheElementBasedSurfacedialog.13.SelectSolidskinfromtheSelectfacesby:radiobuttons.14.SelectacolorfromtheSolidskincolor:button.15.ClicktheFacesbutton.Thiscreatesatemporaryskinoftheselectedelementsandopenstheelementselectorpanel.16.Selectanelementfromthesolidskin,clicktheelemsbutton,andselectbyface.Youwillseefacesallaroundthesolidskinarehighlighted.17.RotatethemodelintheHyperMeshinterfacetoverifyalldesiredfacesareselected.Youcandeselectanyelement(byrightclicking)oraddmoreifyoulike.18.Whenyouaresatisfiedwiththeelementfacesselected,clickproceedtoreturntotheElementBasedSurfacedialog.19.ClicktheAddbuttontoaddthesefacestothecurrentsurface.Thiscreatesspecial"face"elements(rectangleswithdotatthemiddle)fordisplay.Youcanrejecttherecentlyadded"faces"byclickingtheRejectbutton.Youcanalsodelete"faces"fromtheDeleteFacepage.Whensatisfiedwiththesurfacedefinition,clickClosetoreturntotheAbaqus20.ContactManagerdialog.Step12:DefinethesurfaceinteractionpropertyInthisexercise,youwilldefinethe*SURFACEINTERACTIONcardwithcorresponding*FRICTIONcard.Completethestepsbelowtocreatethe"friction1"surfaceinteraction:1.SelecttheSurfaceInteractiontabattheAbaqusContactManagerdialog.2.ClicktheNew…button.ThisopenstheCreateNewSurfaceInteractiondialog.3.IntheName:field,enterfriction1.4.ClicktheCreate…button.TheSurfaceInteractiondialogopens.5.SelecttheDefinetab.6.SelectFrictionoptionassurfaceinteractionproperty.ThatmakestheFrictiontabactive.7.SelecttheFrictiontab.8.SelecttheFrictiontype:asDefaultandclicktheDirectoption.SelectingthisoptionmeansthattheexponentialdecayandAnisotropicparameterswillnotbewrittentotheinputfile.9.IntheNoofdatalinesfield,enter1andclickset.AsinglerowappearsintheDirecttable.10.ClickthefirstcellontheFrictionCoeffcolumnandenter0.05.ForDirectandAnisotropictables:•ThecolumnnumbersinthetablewillchangewiththeNoofDependenciesselected.TherownumberscanbedefinedattheNoofdatalinesentrybox.ClickingthecorrespondingSetbuttonwillupdatethetabletohavethespecifiednumberofrows.•Forplacingvaluesinthetable,clickacelltomakeitactiveandtypeinthevalues.Thetableworkslikearegularspreadsheet.•Youcanalsoreadcomma-delimiteddatafromatextfilebyclickingtheReadFromaFilebutton.Thisbuttonopensupafilebrowserwindow.SelectthefileandclickOpentoexportthecomma-delimiteddata.Therownumberwillbesettothenumberofdatalinesfoundinthefile.•Right-clickinginthetableshowsapulldownmenuwithcopy,cutandpasteoptions.Comma-separateddatacanbecopied/cutintoorpastedfromclipboardwiththeseoptions.Relevanthotkeys(forexample,Ctrl-c,Ctrl-xandCtrl-vinWindows)willalsowork.•Clickingtheleftmousebuttoninacellactivatesthatcell.Clickingintoanalreadyactivecellmovestheinsertioncursortothecharacternearestthemouse.•Movingthemousewhiletheleftmousebuttonispressedhighlightsaselectedarea.•Theleft,right,upanddownarrowsmovestheactivecell.•Shift-<arrow>extendstheselectioninthatdirection.•Ctrl-leftarrowandCtrl–rightarrowmovetheinsertioncursorwithinthecell.•Ctrl-slashselectsallthecells.•Backspacedeletesthecharacterbeforetheinsertioncursorintheactivecell.Ifmultiplecellsareselected,Backspacedeletesallselectedcells.•Deletedeletesthecharacteraftertheinsertioncursorintheactivecell.Ifmultiplecellsareselected,Deletedeletesallselectedcells.•Ctrl-amovestheinsertioncursortothebeginningoftheactivecell.Ctrl-emovestheinsertioncursortotheendoftheactivecell.•Ctrl–minus(-)andCtrl–equal(=)decreaseandincreasethewidthofthecolumnwiththeactivecellinit.•Tointeractivelyresizearoworcolumn,movethemouseovertheborderwhileButton-1orButton-3(therightbuttononWindows)ispressed.11.ClickOKtoreturntotheAbaqusContactManagerdialog.Step13:Createthe"Beam-Indentor"contactpair1.GototheInterfacetaboftheAbaqusContactManagerdialog.2.ClicktheNew…button.ThisopenstheCreateNewInterfacedialog.3.IntheName:field,enterBeam-indentor.4.SelectContactpairasthetypeofinterface.5.ClicktheCreate…button.TheContactPairwindowopens.6.SelecttheDefinetab.7.ClicktheSurface:pulldownmenutoshowalistoftheexistingsurfaces.8.SelectindentorfromthelistandclicktheSlave>>buttontoidentifyitastheslavesurfaceandmoveitintothetable.9.ClickthecorrespondingReviewbutton.Theselectedsurfaceishighlightedinred.Ifthesurfaceisdefinedwithsets(displayoptiondisabled),theunderlyingelementsarehighlighted.Right-clickonReviewtoclearthehighlighting.ThecorrespondingNewbuttonopenstheCreateNewSurfacedialogforcreatinganewsurface.Whenyouaredonecreatinganddefiningthesurface,theContactPairwindowreturnswiththenewsurfaceselectedastheslavesurface.10.Repeatsteps7and8,selectingBeamandclickingtheMaster>>buttontoidentifyitasthemastersurface.Note:Tomoreclearlyseethesurfacesavailableforselection,clicktheicon.Thisopensanenhancedbrowserwhereyoucaneasilysearchfortheappropriateitem.YoucanalsoclicktheFilterbuttontofiltertheitemsdisplayed.11.ClicktheInteraction:dropdownlisttoseealistoftheexistingsurfaceinteractions.Note:Tomoreclearlyseetheinteractionsavailableforselection,clicktheicon.Thisopensanenhancedbrowserwhereyoucaneasilysearchfortheappropriateitem.YoucanalsoclicktheFilterbuttontofiltertheitemsdisplayed.12.Selectfriction1fromthelistastheinteractionpropertyforthecurrentcontactpair.13.SelecttheParametertab.14.SelectSmallSlidingfromtheavailableoptions.15.ClickOKtoreturntotheAbaqusContactManagerdialog.16ClickclosetotheAbaqusContactManagerdialog.免责声明:本页面/内容部分素材来源于互联网公开信息,旨在传递更多信息,不代表本平台立场。版权归原作者或机构所有,如涉及侵权,请通过平台联系我们,我们将在核实后第一时间处理。本平台对转载内容的真实性、准确性不作任何保证,用户需自行判断并承担使用风险。


 、
、